Featured Exhibits
Sign up for the Newsletter
Advertise on ParachuteHistory.com
Disclaimer
Privacy Policy
About
PRO Pack: Steps 21-25
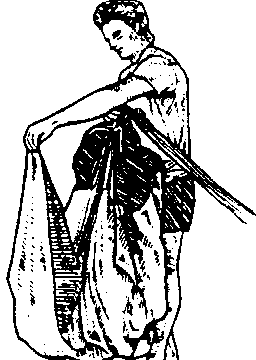 21. Reach down and pick up the middle point of the trailing edge.
The manufacturer's ID panel is sewn to the top of the center cell
near the trailing edge. Lift it up and put the middle seam up
with the slider grommets, holding it in place with your thumb
or finger.
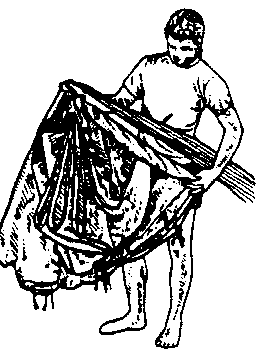 22. Loosen your knee grip on the leading edge of the canopy. Find
the middle of the leading edge by running your hand down between
the front two slider grommets. Exactly half of the lines will
be on one side and half on the other.
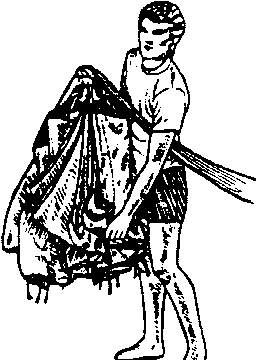 23. Leave the middle cell hanging, pick up all the others on one
side and roll them in toward the middle.
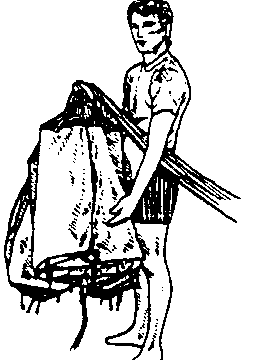 24. Do the same on the other side. When you're done, this is how
the leading edge should look.
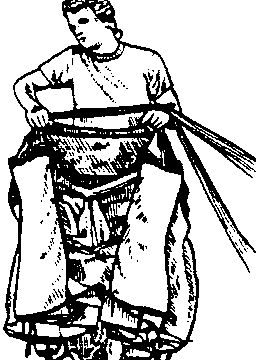 25. This shows how steps 23 and 24 help slow down openings. As
the canopy opens (remember that this illustration shows the canopy
upsidedown) the center cell inflates and the sides are slowed
somewhat by the fact that they are rolled separately. The result
is more controlled, symmetrical inflation. If you want your canopy
to open faster, just leave the leading edge hanging neatly flaked
and don't roll it at all. This leaves the leading edge exposed
to the airstream and will help the canopy inflate faster.
[Products] | [Services]
[Join Our Mailing List] | [Advertise on ParachuteHistory.com]
[ ]
[Disclaimer] | [Privacy Policy] | [About]